Satpro test operation, inside or outside the office
Test SATPRO operation, inside or outside the office
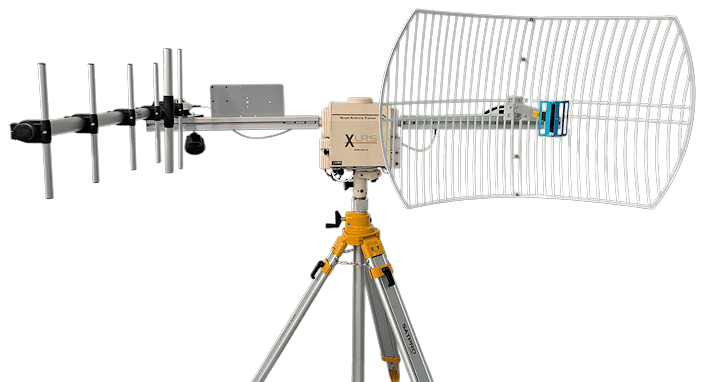
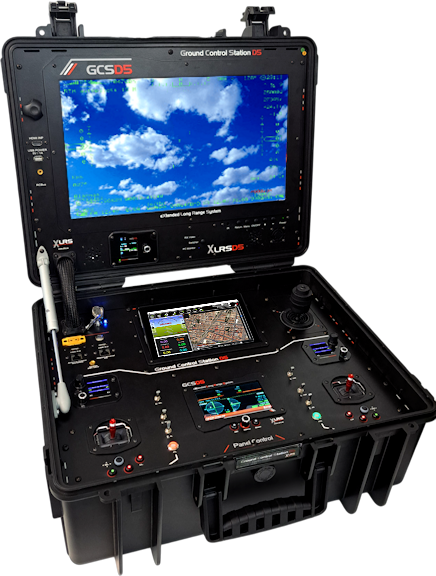
Test Purpose:
The purpose of this test is to perform a quick verification of the SATPRO’s functionality.
You will conduct a test either indoors or outdoors to ensure that the SATPRO is receiving Mavlink telemetry data from the autopilot’s GPS. Additionally, you will establish communication with the mission planner from the GCS and with the XLRS_SATPRO software via an ethernet connection. For this, you will assemble a portable system using a tray or container to hold the RXLRS receiver, the Cube Orange autopilot (or similar), and batteries. Move the tray more than 10 meters away and walk around the SATPRO to verify that it is correctly tracking the system.
Important Note for Indoor Testing:
Keep in mind that during indoor tests, the autopilot’s GPS may not be very accurate, which could result in erratic movements of the SATPRO. This is due to the imprecision of GPS data indoors. To confirm functionality, you can check the GPS data or the UAV’s movement in Mission Planner. However, for a more efficient and precise test, it is recommended to perform it outdoors, where the GPS can obtain accurate data.
Required Materials
- SATPRO antenna tracker.
- WMX481 radio module.
- An XLRS GCS.
- A tray or container to hold:
- RXLRS receiver.
- Cube Orange autopilot (or similar) with its GPS module.
- Batteries.
- SATPRO connected via ethernet to the GCS, laptop, or external PC.
Note:
It is necessary to use the XLRS_SATPRO software to verify the Origin tracker Position “HOME” position coordinates of the SATPRO and the Mavlink coordinates of the UAV. This will ensure that the system is properly configured and capable of accurately tracking the position.
Warning:
Before continuing with this test, to have correct operation and avoid any breakdown during the process, it is very important and necessary that you have read all the previous steps in the SATPRO manual.
Firts Steps:
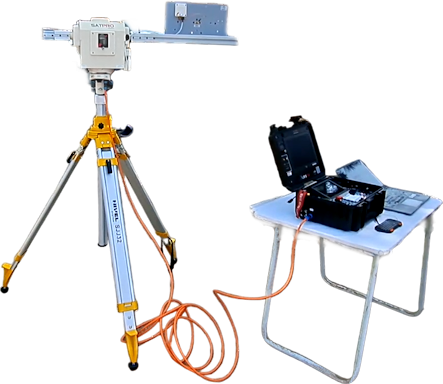
1- All devices turned off: Ensure that the tray with RXLRS and autopilot, GCS XLRS, SATPRO, and WMX481 are powered off.
2- Power on SATPRO: Wait for it to complete the calibration of the X and Y axes.
3- Position SATPRO facing north: Use a compass or download a digital compass app on your mobile phone for assistance.
Important Note: Ensure you have completed Step 2 and powered on SATPRO, allowing it to complete the calibration of the X and Y axes. This step is crucial because if SATPRO is positioned to face north while powered off, it may misalign from true north after powering on. SATPRO first needs to center and zero its X and Y axes during calibration. If this step is skipped, SATPRO may not track correctly as it will not be properly aligned with north.
4- Connect cables: Connect the SATPRO’s RCBUS cable and ethernet cable to the GCS.
5- Turn on the XLRS GCS.
6- Open the XLRS_SATPRO software: Establish communication to verify data later during the test.
7- Open the Mission Planner software: Don’t establish communication yet.
8- Set up the mobile platform: Place the autopilot, RXLRS receiver, and batteries on a mobile platform, such as a tray or similar.
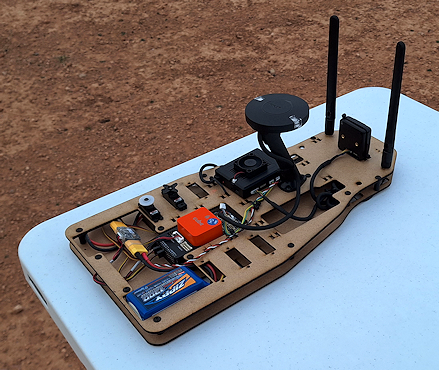
9- Move outdoors: Once the devices are placed, connected, and installed on the tray, take the setup outdoors if possible, turn on the devices, and wait to receive Mavlink GPS data.
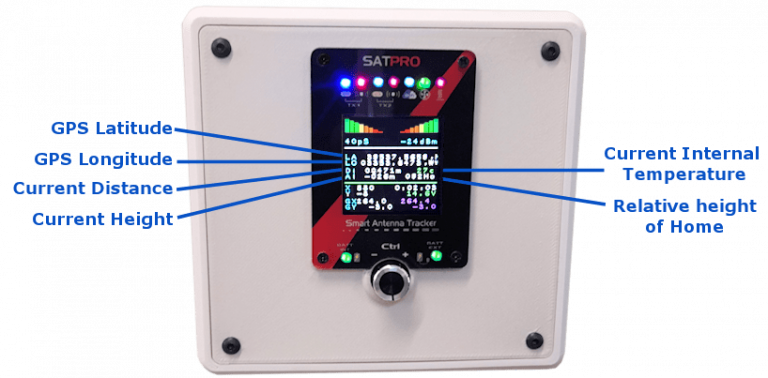
10- Wait for SATPRO to receive GPS data: From SATPRO’s display, check if it starts receiving Mavlink GPS packets. Once data is received, it will display the UAV’s GPS coordinates on the screen, including latitude, longitude, altitude, relative altitude, distance, and more.
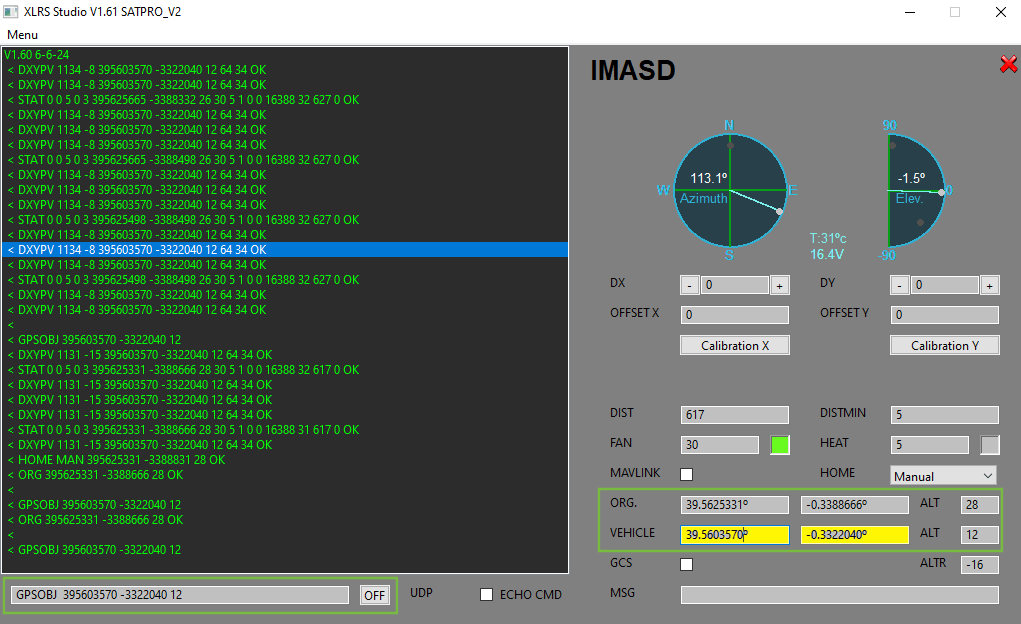
11- Verify data via XLRS_SATPRO: In the XLRS_SATPRO software, review the parameters under “ORG.” and “VEHICLE” to see the corresponding data.
12- Establish communication with Mission Planner: While waiting to receive GPS data, connect Mission Planner to the system.
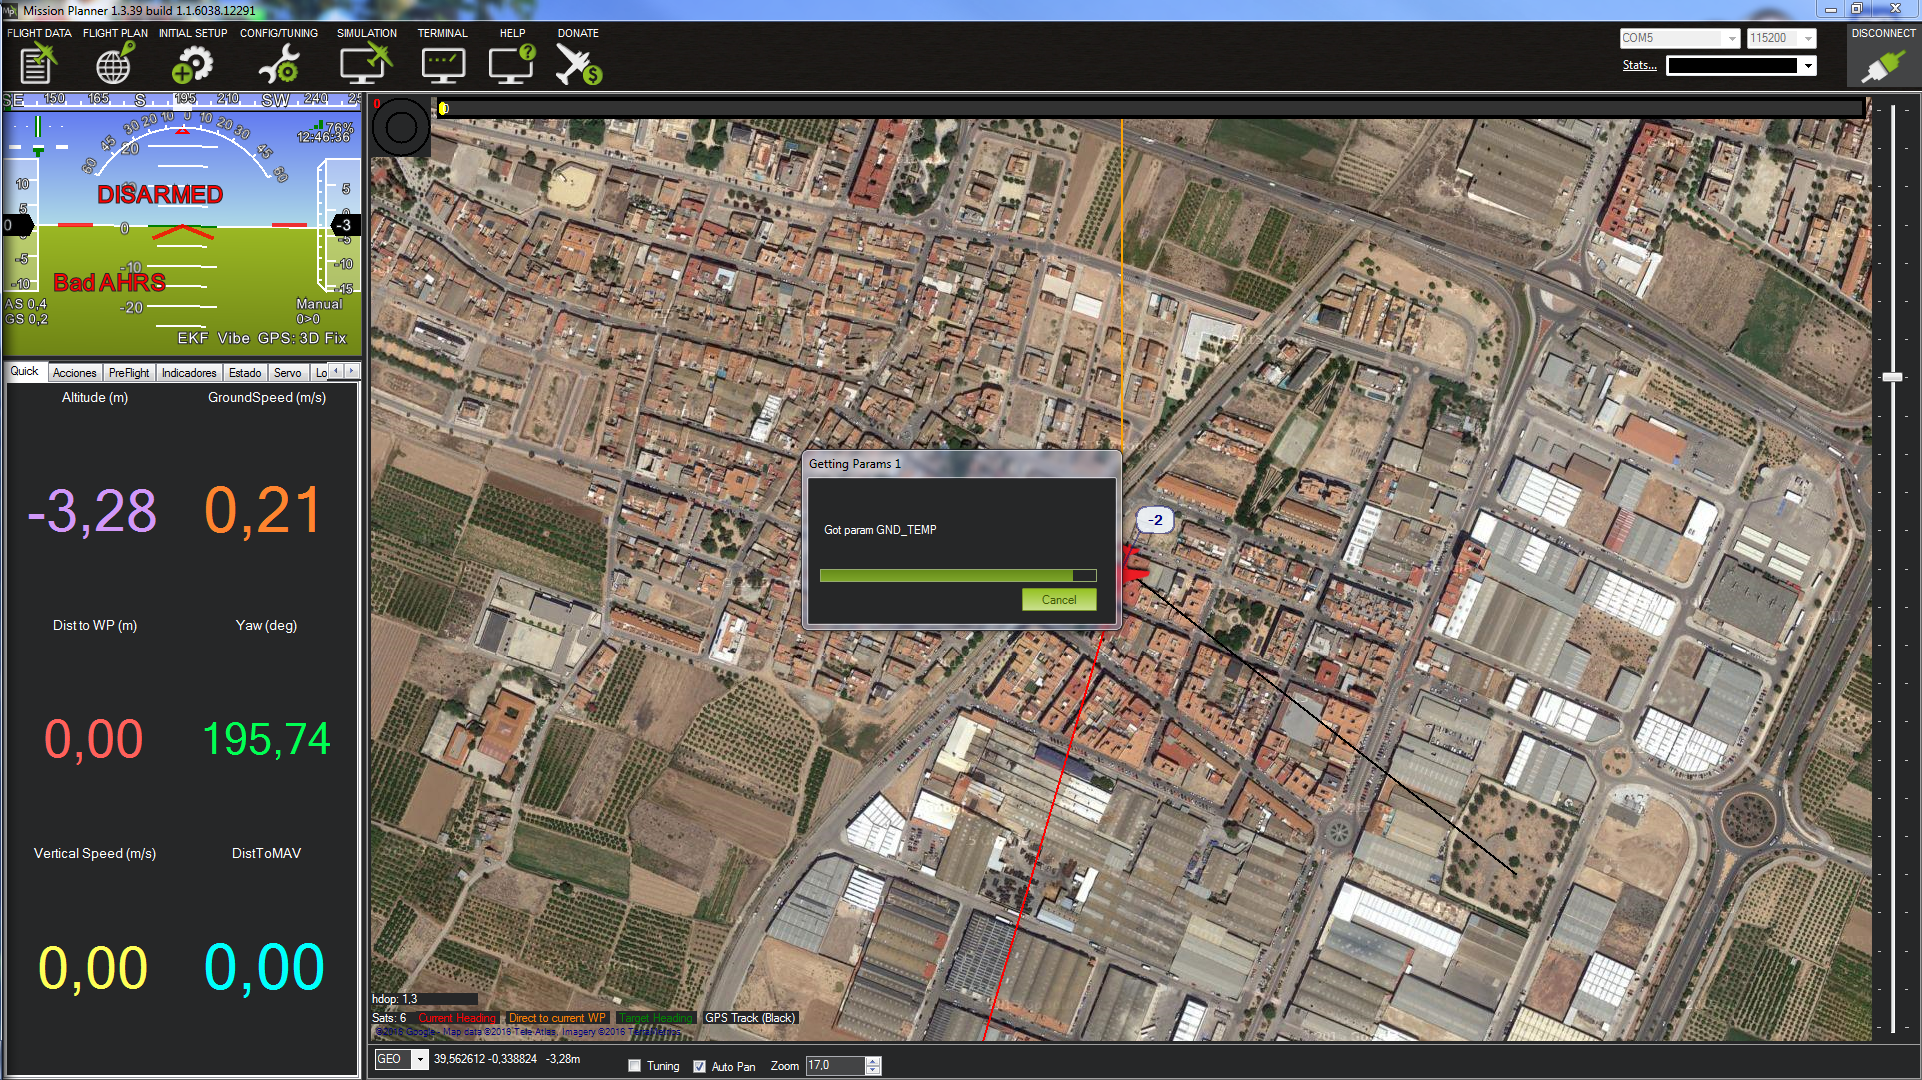
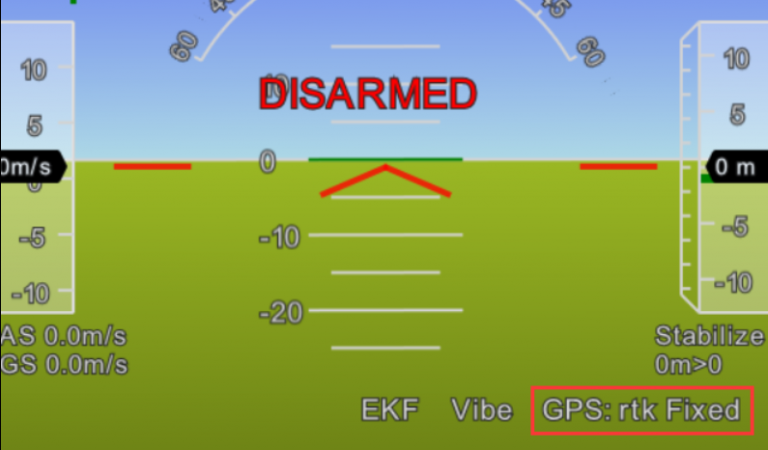
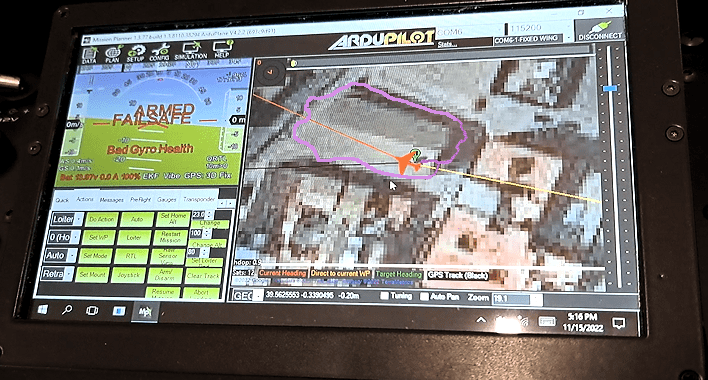
13-Verify GPS in Mission Planner: From the main screen in Mission Planner, ensure that the GPS data is available and correctly received.
14. Handling SATPRO Movement When Receiving Mavlink Telemetry (GPS):
When SATPRO begins receiving Mavlink telemetry packets (GPS), it may start moving if the UAV and SATPRO are very close to each other. This occurs because SATPRO receives slightly different coordinates as the UAV is not perfectly stationary, which you can observe in Mission Planner where the aircraft appears to constantly move on the map.
To address this, there is a safety feature that prevents SATPRO from moving when the vehicle is within a certain distance. You can adjust the DISTMIN parameter according to your preference. By default, this parameter is set to 10 meters.
15. Set and Verify the HOME of SATPRO:
15.1 Review the current HOME parameter configuration in SATPRO:
-
- If the parameter is set to
HOME = MAV, SATPRO will receive GPS HOME data through Mavlink telemetry. However, because GPS data obtained this way may not be precise, we recommend setting the parameter toHOME = GPS.
- If the parameter is set to
15.2 Use the HOME = GPS parameter:
-
- In this mode, SATPRO will use the internal GPS to determine its HOME coordinates. Keep in mind that if SATPRO is indoors (e.g., in an office), the internal GPS might occasionally update coordinates inaccurately due to poor signal quality.
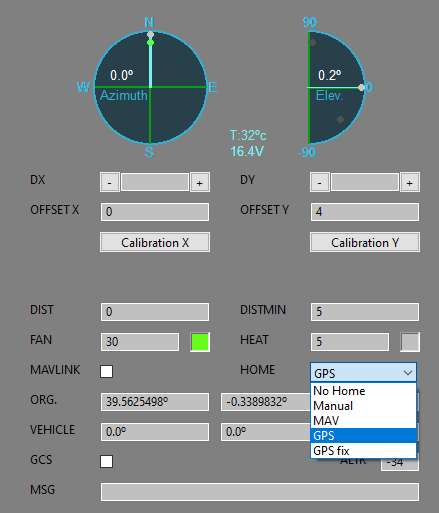
15.3 Configuring “GPS FIX” or “MANUAL”:
-
- Once you see the origin latitude, longitude, and altitude in the “ORG.” parameters from the SATPRO’s internal GPS:
- You can set the HOME parameter to
GPS FIXto lock the last accurate coordinates obtained by the internal GPS. - Alternatively, you can switch to
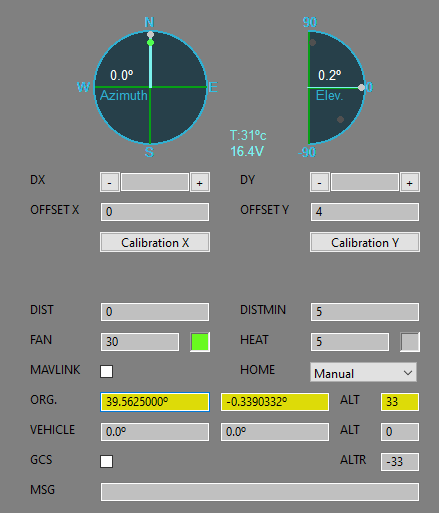
HOME = MANUALand manually input the desired coordinates for the HOME location.
15.4 Verify and adjust the HOME altitude:
-
- It is crucial to ensure that the altitude for the HOME position is correct. If you notice errors in the altitude data, switch to
HOME = MANUALand adjust theALTparameter to the correct altitude for the HOME location. You can verify the altitude using tools such as Google Earth or similar software.
- It is crucial to ensure that the altitude for the HOME position is correct. If you notice errors in the altitude data, switch to
Important Note:
If the HOME altitude is incorrect, SATPRO will calculate an inaccurate relative altitude between its HOME position and the UAV. This could result in errors in SATPRO’s “Y” axis alignment, causing it to not track the UAV accurately.
16- Test Outdoor: Now you can perform an outdoor test by moving the tray, which will simulate the UAV, to a distance greater than 10 meters. You can walk around the SATPRO or position the tray at different points to verify that SATPRO accurately tracks its location.
Note for Indoor Tests:
If the test is conducted indoors, SATPRO might not point exactly to the location of the tray. This is because the GPS data received from the UAV may be inaccurate due to the indoor environment, where the signal quality is limited compared to outdoor conditions.
Test Conclusion and Recommendations
Once you have followed all the steps outlined above, you will have verified how to track the vehicle and that SATPRO is working properly. You are now ready to conduct additional testing, either on the ground or in the field, with your vehicle.
“If you have problems during testing, please refer to the FAQ section for troubleshooting tips.”