SATPRO_Getting_Started_soft
Getting Started
To get started, you need to have the SATPRO connected to the COM port via a Ground Control Station GCSD5 or the USB to RCBus converter module CURCB. Follow these steps:
- Power On the Devices:
- Ethernet Connection (Optional):
- If you are using Ethernet, connect the SATPRO to the router.
- Preparing the SATPRO:
- For testing purposes, the SATPRO does not need to have the arms, antennas, or additional peripherals attached.
- Activate the Application:
- Launch the XLRS_SATPRO application.
- Device Connection Form:
- The device connection form will open immediately.
- First-Time Setup:
- For the first time, it is recommended to use the COM port. Enter the COM port number in the input field and click the “Open COM” button.
- Power On SATPRO:
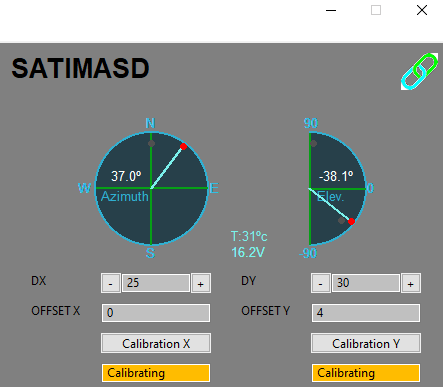
- Turn on the SATPRO. It will begin the initial calibration of the X and Y axes.
- Monitoring the Process:
- If everything goes well and the COM port opens correctly, you will start seeing the command and response text in the console.
- You will also see the movement of the SATPRO Tracker arms, along with position data, battery voltage, and temperature on the graph.
- Calibration:
- Wait until the calibration completes and the SATPRO stops moving.
